Snowman sample
- page2
- shared asset for tree layers
- background as jpeg
- group animation
- path anim
In Snowman sample, you will learn the following common techniques of Kwik
You can download the tutorial file from
TODO Kwik5/SnowMan.zip
from kwik-sample-books in github repo
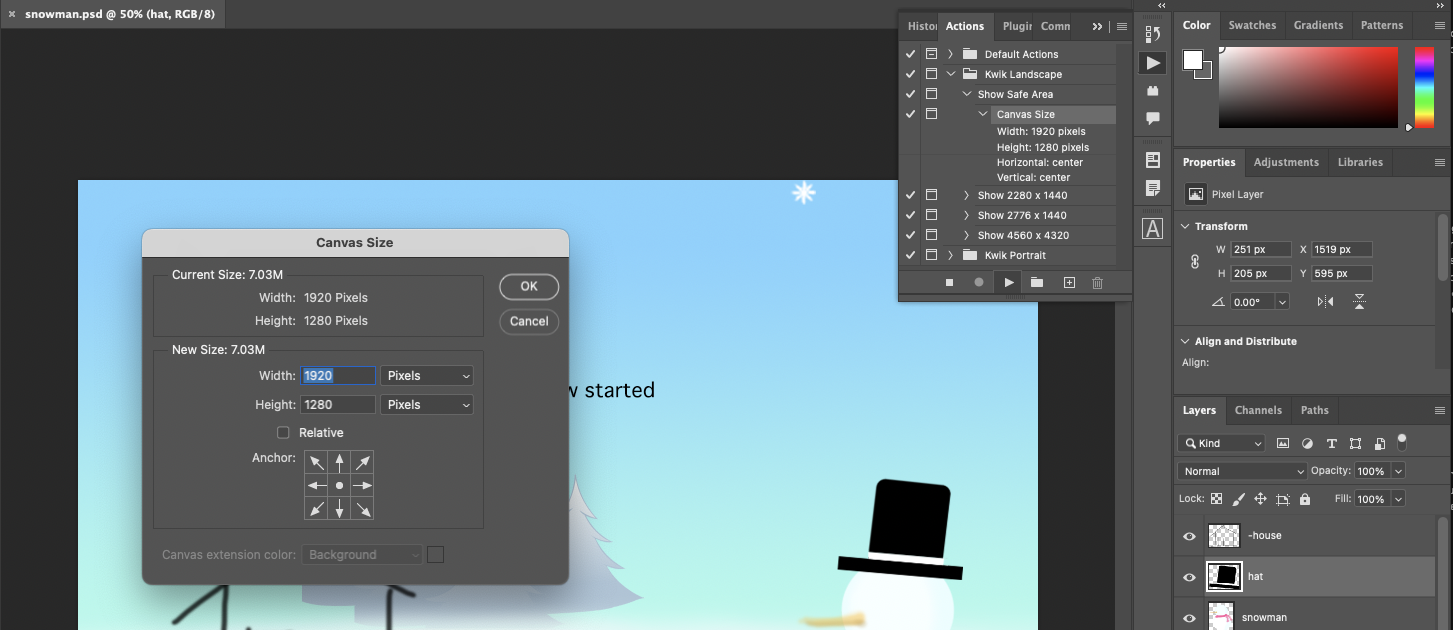
this .psd is 768 x 1024 of Kwik4, so it should be enlarged 1920x1280, you may use Kwik ATN. See get_started/screen_size_orientation
Kwik Exporter
Settings
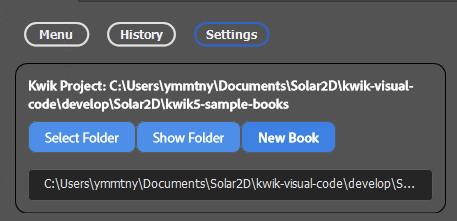
Menu
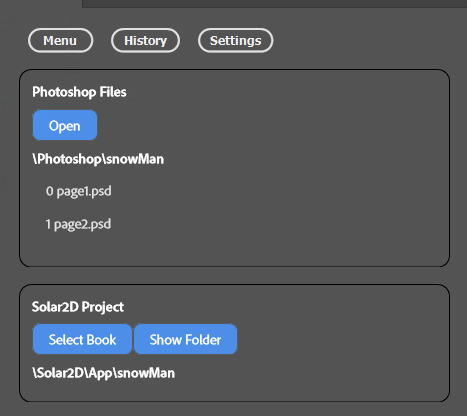
Photoshop Files: Photshop\snowMan
Solar2D Project: Solar2D\App\snowMan
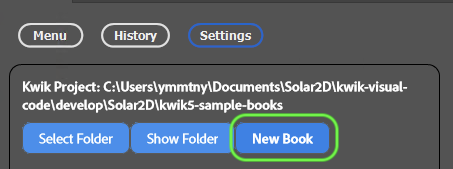
if App/snowMan folder is not present, just create it manually in Finder(mac) or Explore (win) or use New Book in settings
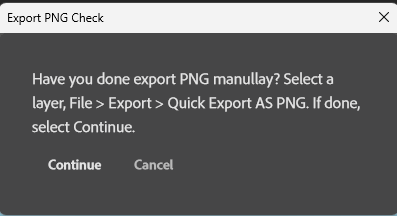
Check Export PNG
You need to test export png work or not before publsihing images with Kwik exporter.
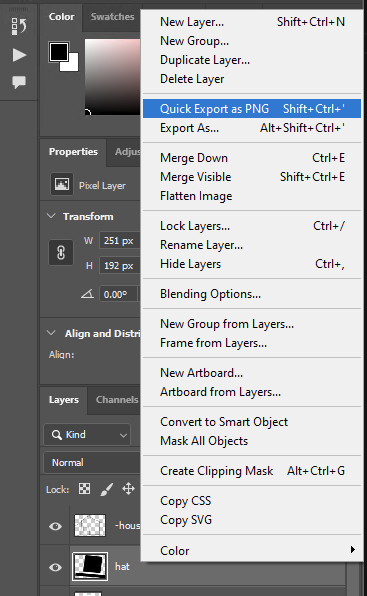
- Select hat layer and then right click to show the context menu
- Choose Quick Export as PNG
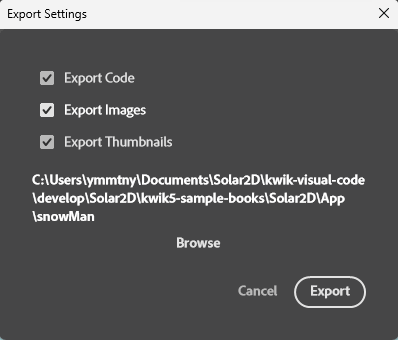
Select the psd files
select the psd files with check marks
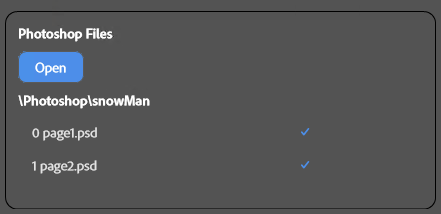
or set the checbox of all checked
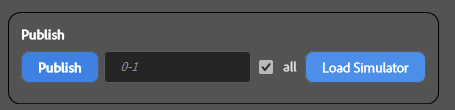
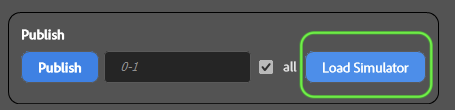
Publish
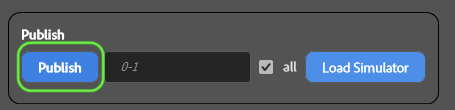
click the Publish button
the dialog appears, select Continue
the settign dialog appears, select Export
Load Simulator
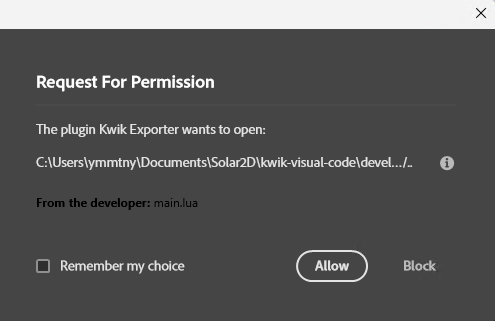
Request For Permission appears, select Allow
Mac
- TODO screenshot
Windows
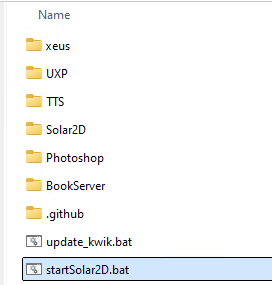
Click startSolar2D.bat
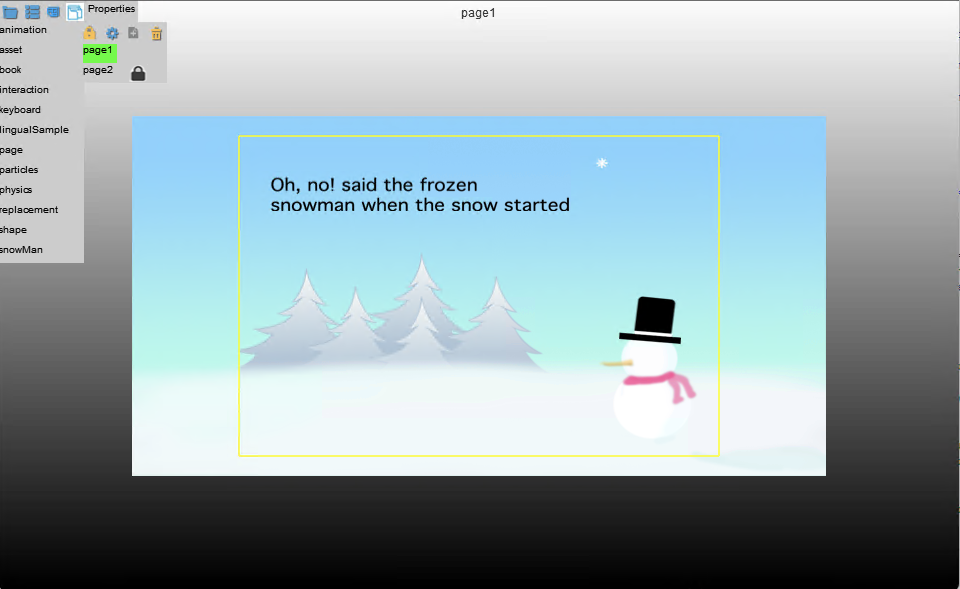
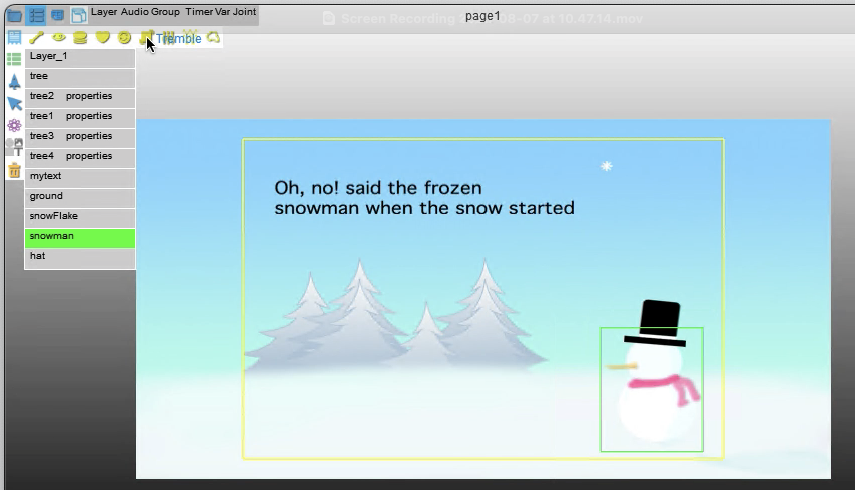
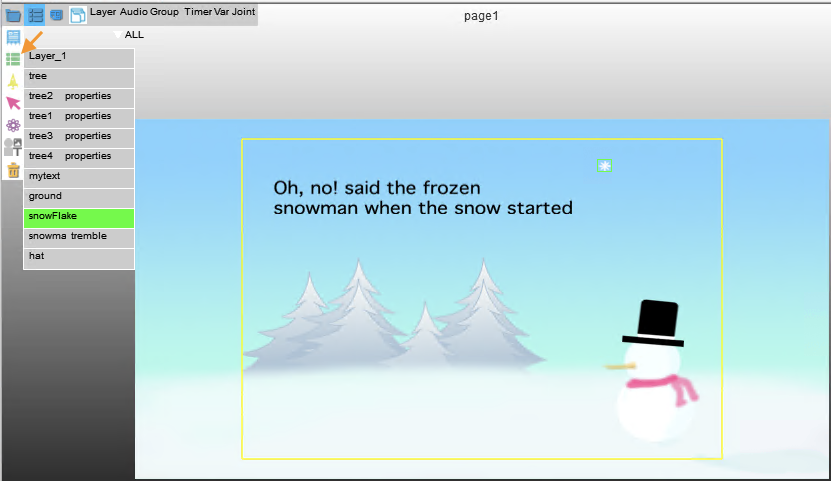
page1
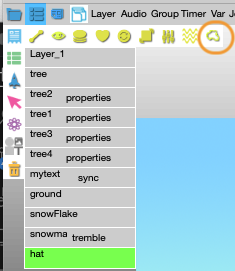
these are main layers
- snowman
- house
- tree
- text
- start

House
The house layer is under construction so we like to ignore while publish images with Kwik.
add a dash symbole - before the layer name, the layer with - won’t be published

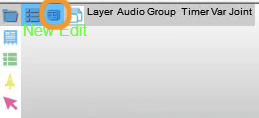
Kwik Editor
Tree - Render As
the tree image is reused for other tree layers.
select tree1, tree2, tree3, tree4 layers together.
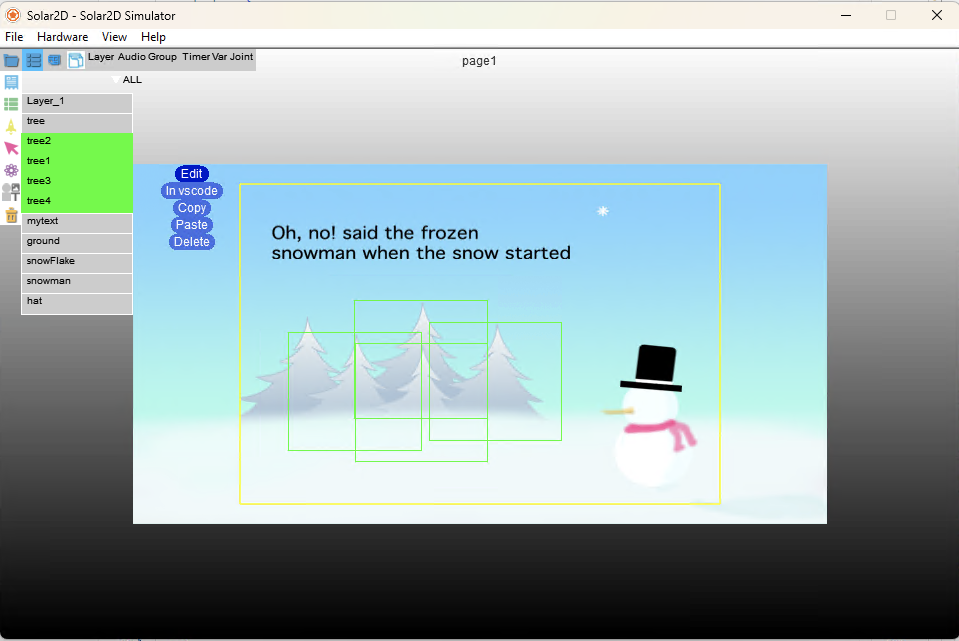
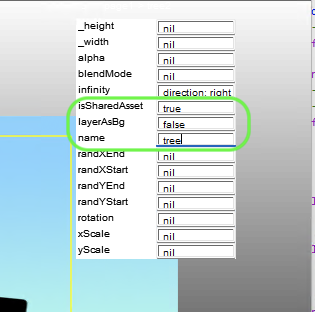
then right-click to select Edit, it will open the properties edit table. Set the following shared asset properties to share ’tree’ layer to be used for tree1, tree2, tree3 and tree4
isSharedAsset: true
name: tree
tree{1, 2, 3, 4}_properties.lua are created, and the imagePath is
tree.pnginstead of tree{1, 2, 3, 4}.png
Snowman animation
Try the followin settings with Tremble(Shake), select snowman layer in the layer table view
Animation > Treamble
Tremble widget
- autpPlay : false
- delay : 0
- duration: 100 (ms)
- Loop 3 times
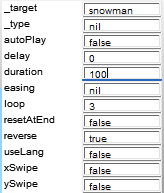
- rotation : 15
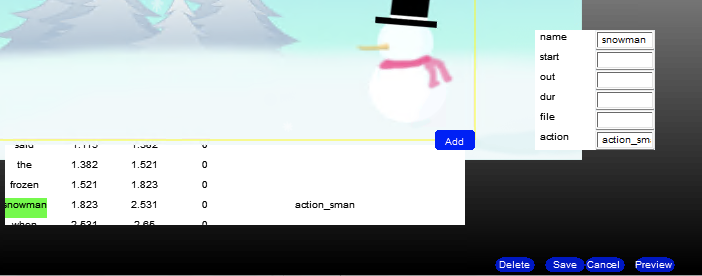
create an action to play the tremble animation
this action will be kicked to start from the audio sync with text at the timing of ‘snowman’ word.
- Name:action_sman
- play animation
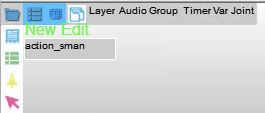
the action name is “action_sman” is used later.
- select
Actionicon - select
New
input action name as action_sman , and press Continue

Animation > play
- target: snowman_tremble

Save
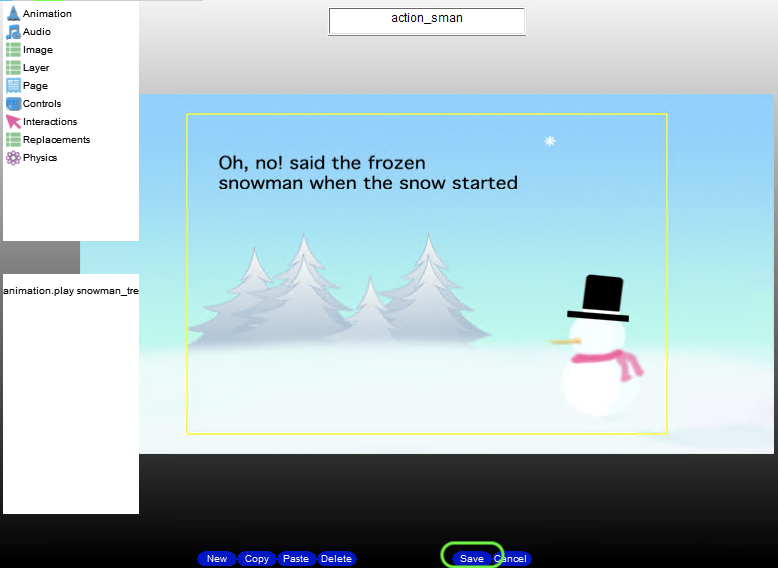
Then the simulator is reloaded after pressing Save, and you will see `action_sman’ in Action Table view
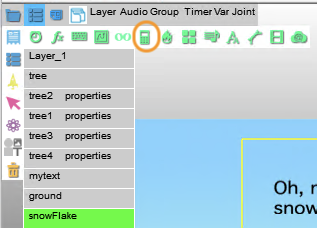
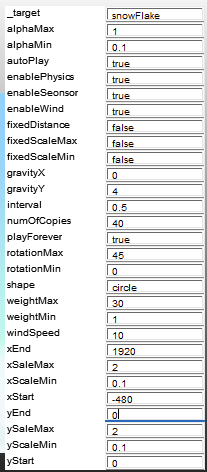
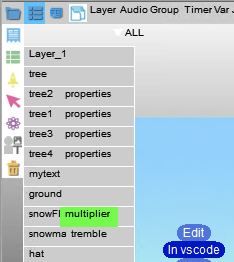
Snowflake - multiplier
Select snowFlake layer
Layer Replacement > Multiplier
- auto play: true
- enable physics : true
- interval 0.5 sec
- number of copies : 40
- rotation max : 45
- rotaion min : 0
- play forever
- xEnd : 1920
- xStart: 0
- yEnd : 0
- ySatrt :-480
You may directly edit the properites to make the multipier aniamtion better in vs code
properties = {
  target         = "snowFlake",
    alphaMax       = 1,
    alphaMin       = 0.1,
    autoPlay       = true,
    enabledWind    = true,
    enablePhysics  = true,
    enableSeonsor  = true,
    fixedDistance  = false,
    fixedScaleMax   = false,
    fixedScaleMin   = false,
    gravityY        = 0.2,
    interval       = 0.5,
    numOfCopies    = 40,
    playForever    = true,
    rotationMax    = 45,
    rotationMin    = 0,
    physicsShape   = "",
    weightMax      = 4,
    weightMin      = 1,
    windSpeed      = 10,
    xEnd           = 1920,
    xSaleMax       = 1,
    xScaleMin      = 0.7,
    xStart         = 0,
    yEnd           = 0,
    ySaleMax       = 1,
    yScaleMin      = 0.7,
    yStart         = -480,
  },
Read Me Audio
Sync text2audio is created to myText layer. You find ohono.mp3 and ohno.txt files in the sample. ohono txt contains the timecodes that are created with Audacity. see Audacity section below.
add audio ohono.mp3 as read to me audio
sync audio&text to myText layer
notice ohno.txt has a line break “/n” at “frozen”
0.185760	0.417959	Oh
0.417959	0.893968	no
1.114558	1.381587	said
1.381587	1.520907	the
1.520907	1.822766	frozen/n
1.822766	2.530975	snowman
2.530975	2.649977	when
2.649977	2.763175	the
2.763175	3.041814	snow
3.041814	3.610703	started
Preparation
copy ohono.mp3 and ohono.txt to App/snowMan/assets/aduios/sync directory
cd YOUR_PROJECT_ROOT
cp ./Photoshop/snowMan/ohono.mp3 ./Solar2D/App/showMan/assets/audios/sync
cp ./Photoshop/snowMan/ohono.txt ./Solar2D/App/showMan/assets/audios/sync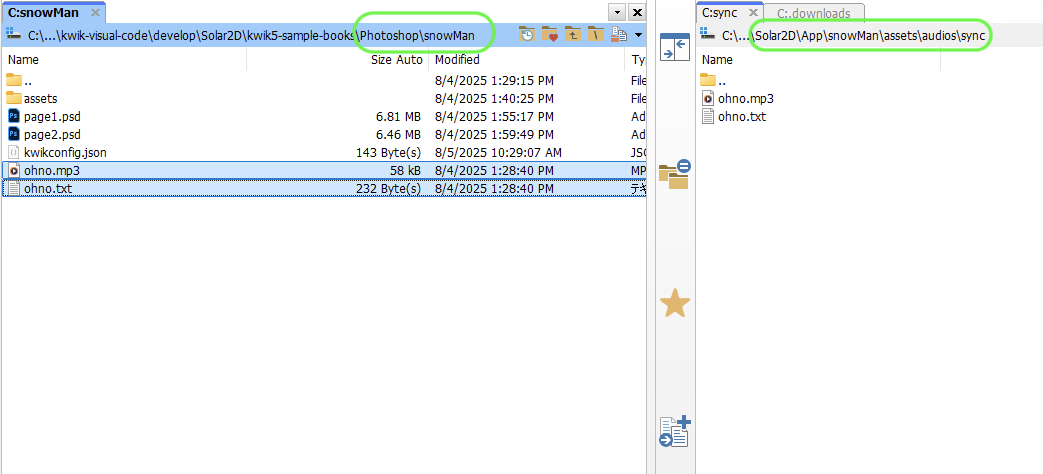
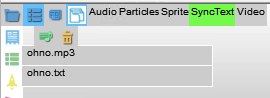
In the assetTable view, you see ohno.txt and ohno.mp3 in SyncAudio
Kwik edtior
Let’s add ohno.mp3 ohno.txt for sync audio & text
for audio
- filename : ohono.mp3
- channel : 2
- volume : 10
for text
- filename : ohno.txt
- fontSize : 24
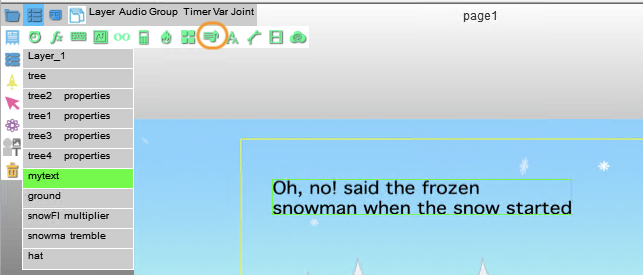
Select mytext in layer table view, and click Relacement > Sync icon
Now you can set audio and text properties, click the label of _filanme, it will show the asset sync&text table for you to choose either .mp3 or .txt
when ohno.txt is selected, it is autmatically parsed to fill the word-timecode table.
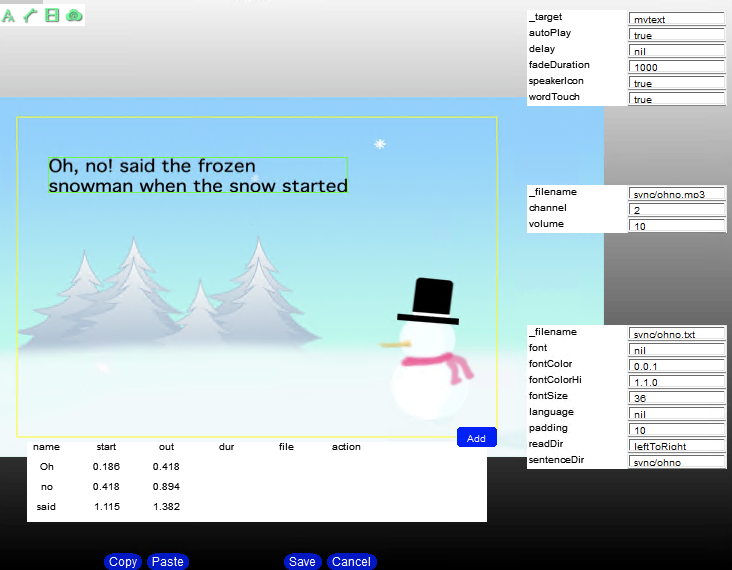
word-timecode table
you can scroll the word-timecode table, or add new row by pressing Add button. If you need to edit, click a row

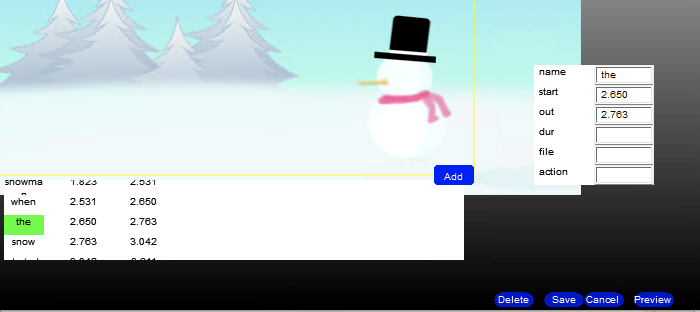
Let’s set atsnowmanword to kick the action action_sman
Audacity
To create the timecode file, use Lavel function in Audacity. You can download Audacity from here https://sourceforge.net/projects/audacity/
Open an audio file
Drag the time with mouse to select the wave area.
Tracks > Add lable at selection (Command + B on Mac, Ctr+B on Win)
File > Export
File > Export Lable

TODO debug
font
mytext layer is a text layer in Photoshop, font name and other text props are available in mytext.lua but most of the fonts in Photoshop are not available in iPhone or Android app.
See Font section for more information
-- text properties
contents =  "Oh, no! said the frozen/nsnowman when the snow started",
font =  "Geneva",
fontSize =  40,
alignment =  "left",
color    =  { 0, 0, 0, 1 },
orientation = "horizontal",
https://docs.coronalabs.com/api/library/display/newText.html
You may obtain an array of available font names via native.getFontNames() available on devices
https://docs.coronalabs.com/guide/system/customFont/index.html
WordTouch
color picker for
- backgroundRectColor
- speakerIconColor
- fontColor
- fontColorHi
readDir: rightToLeft
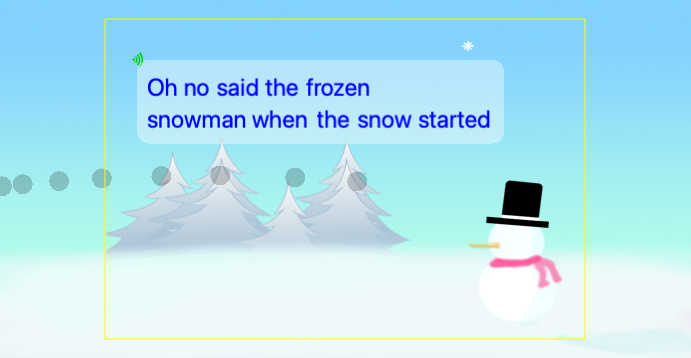
Path Animation with breadcrumbs
Path1 is created from the left to the right. The hat will fly along the path
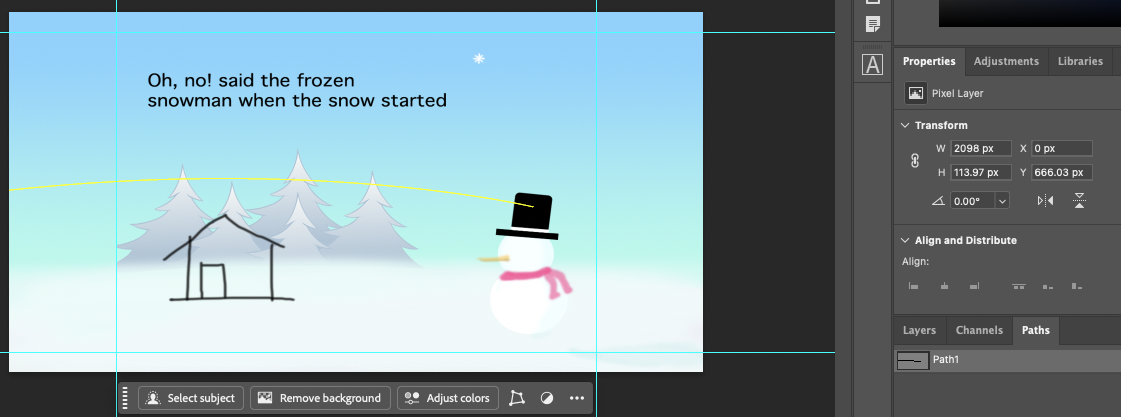
Path Animation
- Layer: hat
- Path: Path1_open
- Auto turn
- Duration 3 sec
- Loop times 1
- Starts: When page starts
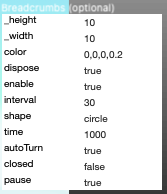
- Breadcrumbs
- Enable
- From: Center
- Shape: Circle
- Width/Radius: 3 px, Height 10px
- Color rand (it means random color)
- Interval: 50
- Dispose after 1 sec
Breadclumbs
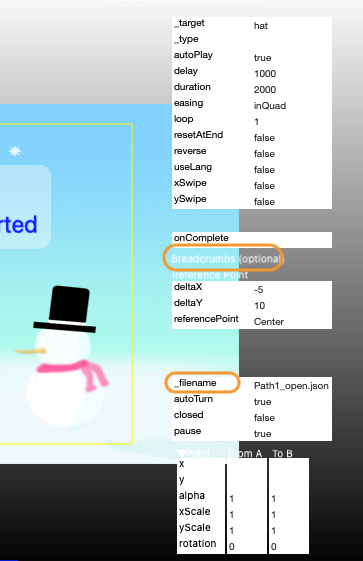
Breadclumbs porperties
it is hidden, so tap the text label to show it , and tap it again to hide it.
_filenme label in path properrites
if you click the
_filenamelabel, it will open the dialog to select a path json file. When you create a path in Photoshop, Kwik exporter publish it as a json file.Select Path1_open.json for the path animation
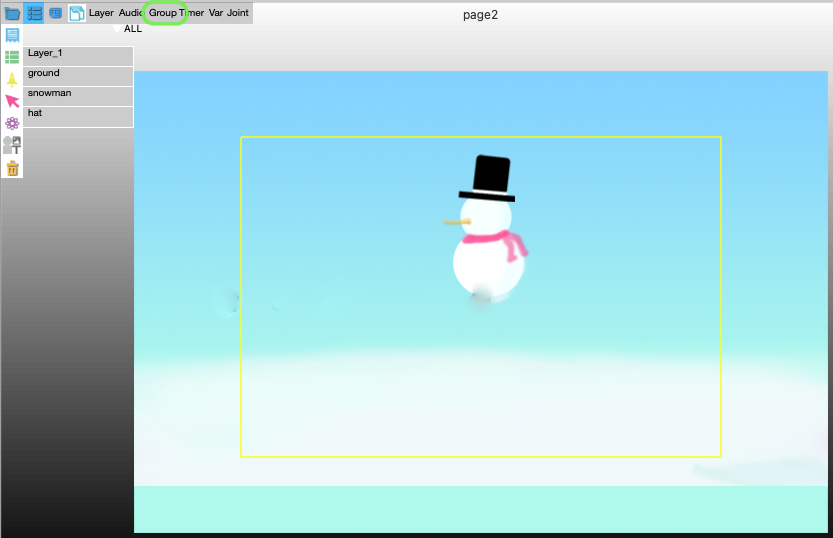
Page2
Animation for Group
you can put hat and snowman into a group. Click Group at the top bar
Then click the grooup add icon

Group edit panels appear
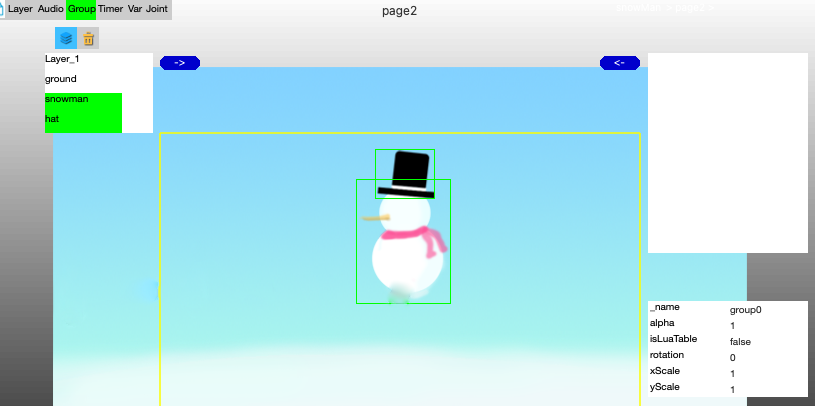
Select hat and snowman layer together, and click the add arrow
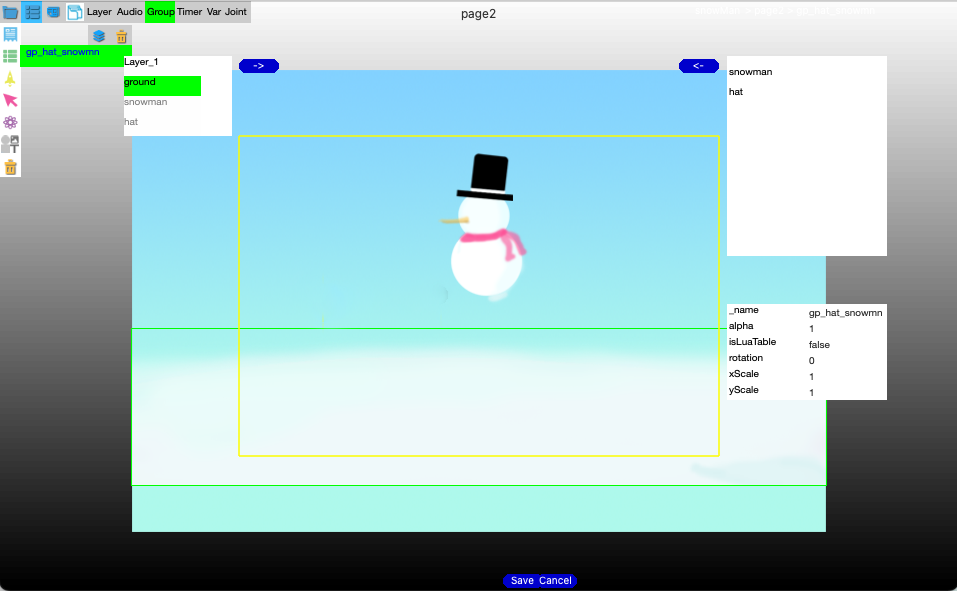
Setting Linear animation to the group, the hat and the snowman moves together.
- _name: gp_hat_snowmn
Save it with Save button at the bottom of Kwik editor, the simulator reload automatically.
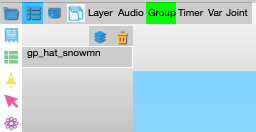
Navigate to the component view, and click Group' shows the gp_hat_snowman’ in the group table view
Linear Animation to the group
- X:605, Y:273
- Duration 3 sec
- Loop times 1
- Starts: When page starts

Linear Animation to the member of the group
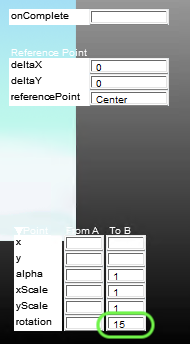
you may add scale, transparency or rotation to the hat additionally
- ReferencePoint: BottomCenter
- To B > rotation: -30
the hat is slanted a little
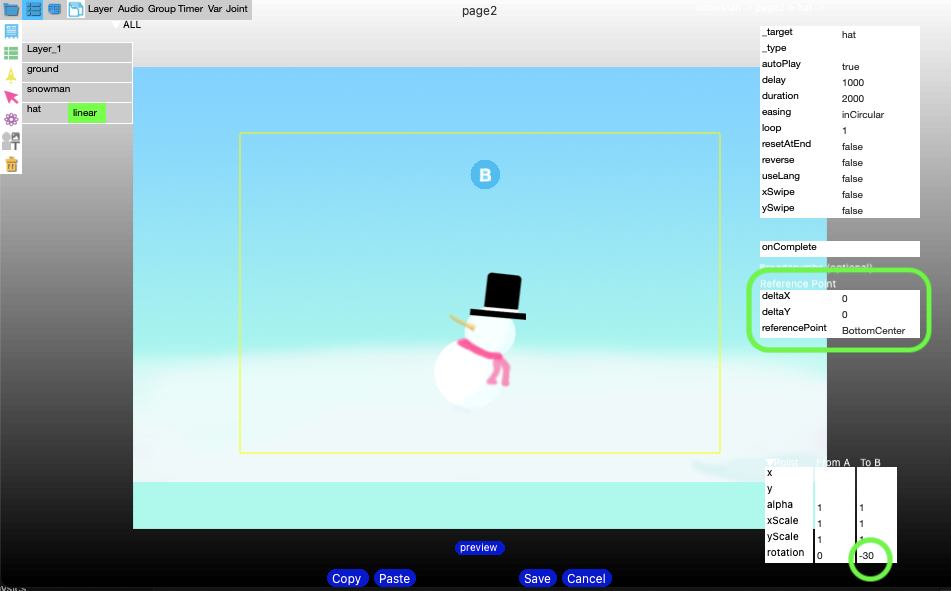
the hat is belonged to the hat and snwoman group, and the group has been configured with the linear animation. It is not good to move the x, y of the hat by the hat animation, so the x and y values of from A, B are emtpy(nil)
background Sharing - Layer Properties
the background layers of page1 and page2 are same, and also does not need to be PNG transparency. So let’s render as jpg and share the background: Layer_1 between page1 and page2.
Save as shared asset in Page2
- isSharedAsset: true
- name: page1/Layer_1

background as jpeg
you can use the following script to convert background png to jpeg
convert_background_to_jpeg.lua
you may specify {Book}:* or {BOOK}:{Page} to skip the conversion
local BASE_DIR = "Solar2D/App"

local SKIP_CONVERSION = {
    "animation:*",
    "book:infinity",
the script creates jpeg images and then update .lua files with type = “jpg”
for instance, App/{BOOK}/components/{Page}/layers/bacground.lua
local layerProps = {
  blendMode = "normal",
  height    =  1360 - -80,
  width     = 2348 - -428 ,
  kind      = pixel,
  name      = "background",
  type      = "jpg",
  x         = 2348 + (-428 -2348)/2,
  y         = -80 + (1360 - -80)/2,
  alpha     = 100/100,
}
Some cases why PNG to JPEG is increasing file size:
PNG was already highly compressed - PNG is using efficient compression for this particular image
Image characteristics - The image likely has: Simple graphics or flat colors (PNG excels at this) Sharp edges or text (PNG lossless is better) Limited color palette
JPEG quality setting - ImageMagick’s default JPEG quality is probably too high (usually 92%) No transparency but PNG’s compression still wins for this content
Cleanup
You can use the following script to clean up PNG files for shared assets:
The script iterates through all pages and:
- Parses
index.luato find layers with “properties” class - Checks the corresponding
{Layer}_properties.luafile forisSharedAsset = true - Removes PNG files (including @2x, @4x variants) for shared assets from
App/{Book}/assets/images/{Page}folder
This is useful after setting up shared assets like the background layer, as the PNG files are no longer needed in pages that reference the shared asset.
To run the cleanup:
cd YOUR_PROJECT_ROOT
lua cleanup_shared_assets.lua
The script will output which PNG files are removed and provide a summary at the end.