Install & Setup
Kwik requires Adobe Photoshop and Solar2D, with Microsoft Visual Studio Code as the recommended code editor.
Note: Android Studio is optional, but Xcode is required for building apps on iOS/Mac.
- Step 1: Install the Kwik exporter
- Step 2: Set up the Kwik exporter with your project folder
- (Optional) Step 2-1: Use the update_kwik script for setup
- Step 3: Run the Solar2D simulator with the code published by the Kwik exporter
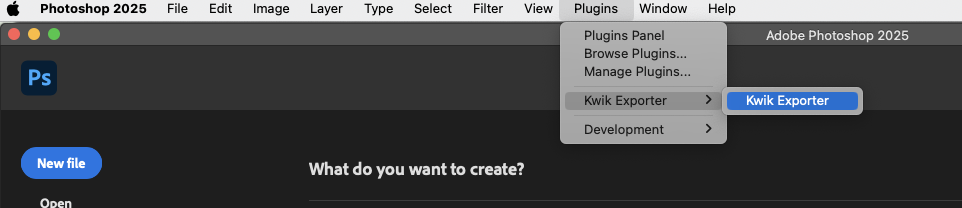
Step 1 – Install the Photoshop UXP Plugin (.ccx)
You can download the Kwik exporter plugin for Photoshop from the releases page of this repository:
Download the
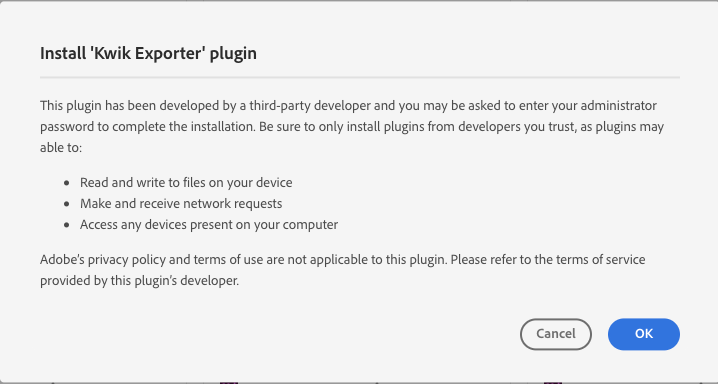
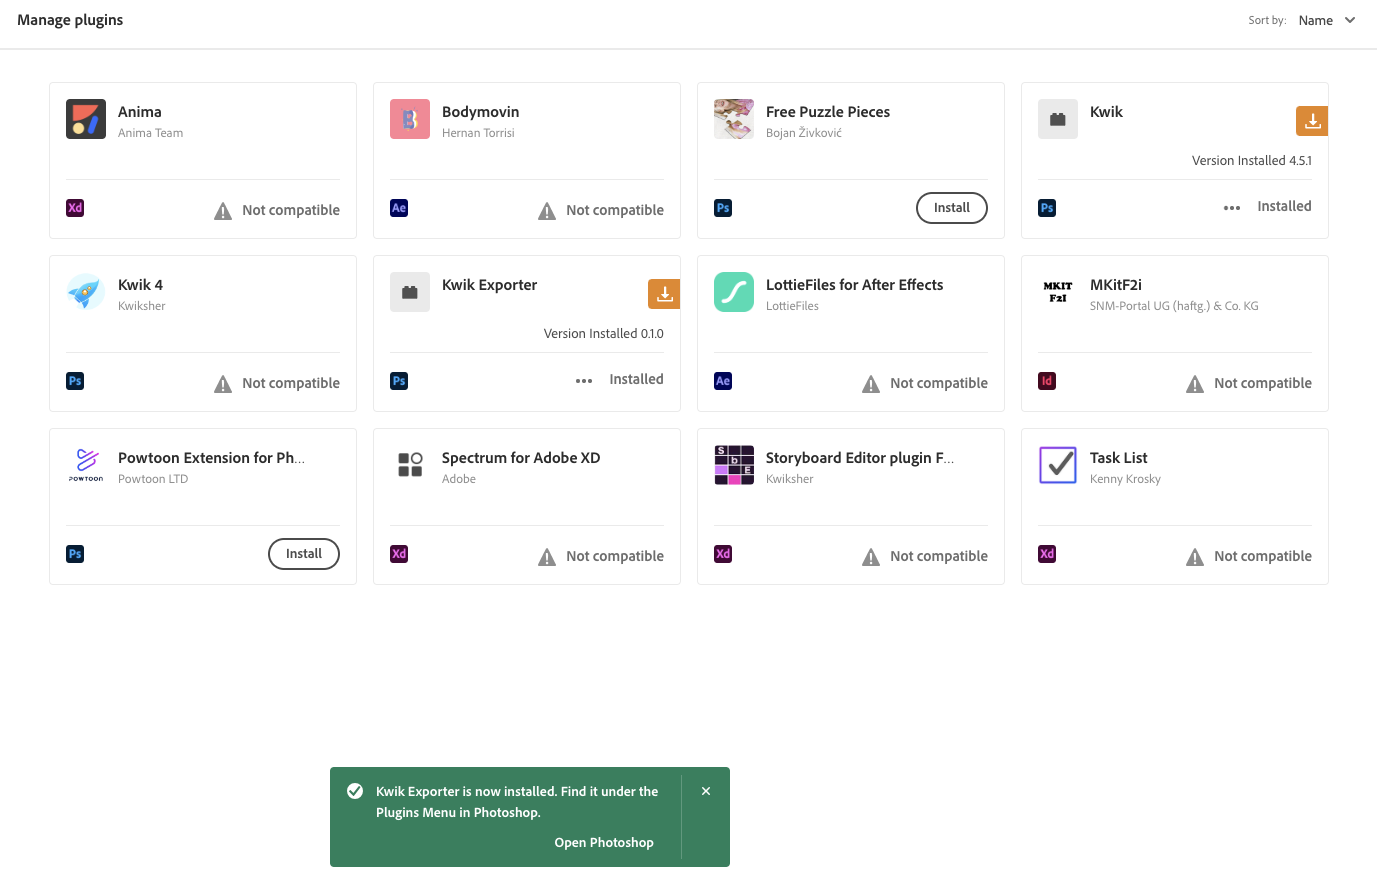
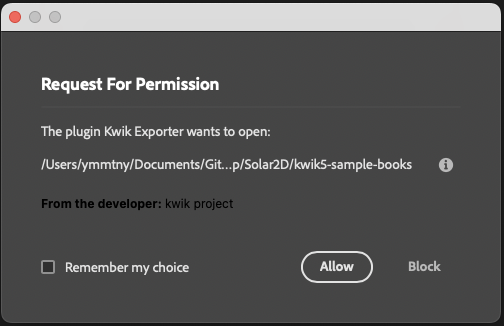
.ccxfile and double-click it to install.The Creative Cloud app will open and prompt you to install—click the install button.
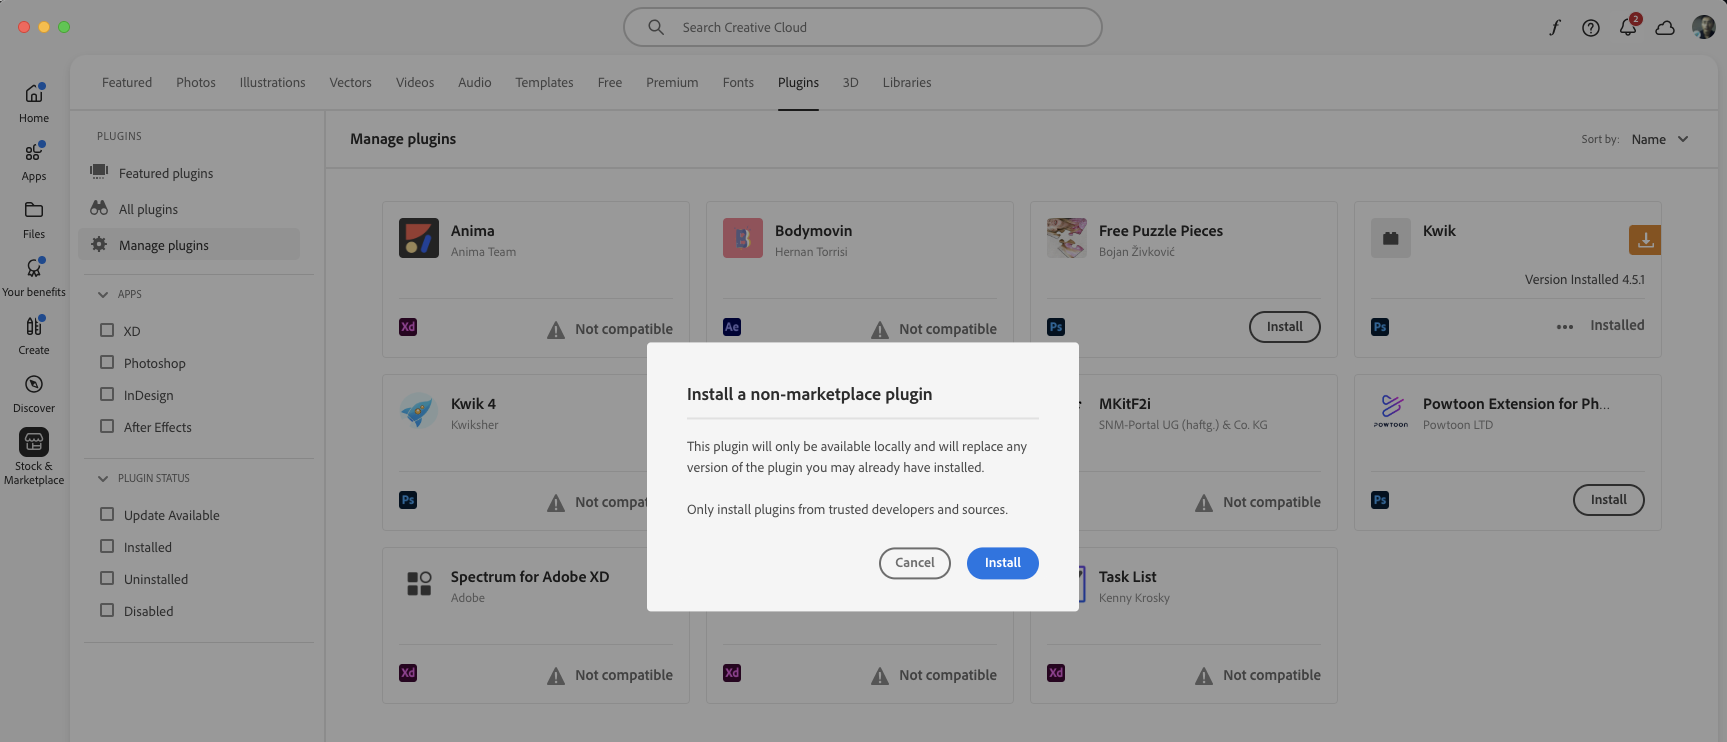
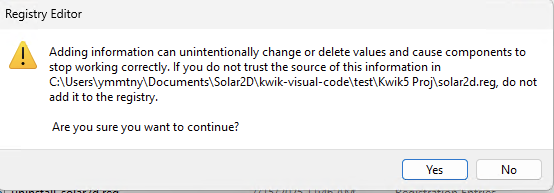
Click “Yes” if prompted.
Open Photoshop.
Step 2 – Using the Kwik Exporter in Photoshop
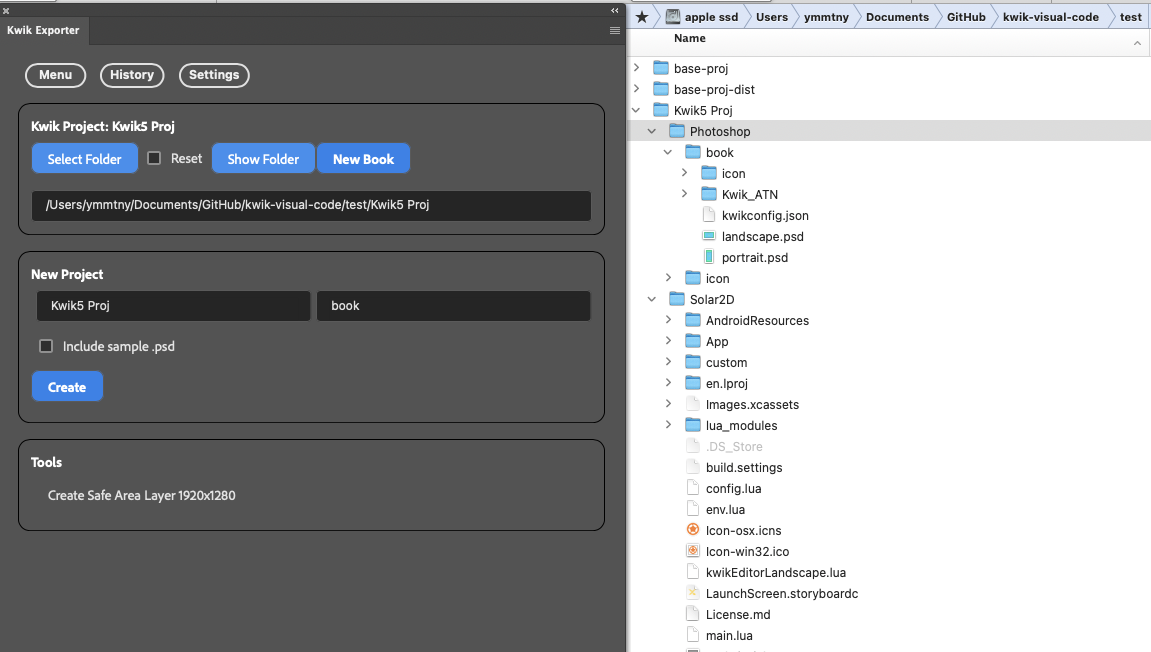
Open the exporter from Plugins > Kwik Exporter in Photoshop. The exporter needs to know:
- Your project root directory (e.g.,
~/Documents/GitHub/kwik5-project-template/) - The
Photoshop/{book}folder containing your.psdfiles - The
Solar2D/App/{book}folder where images and Lua files will be published
Go to the Settings tab
In “New Project,” set your project name and book name.
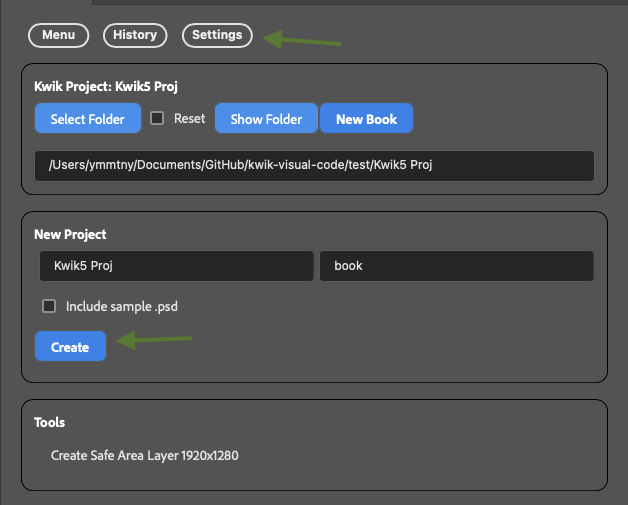
Click “Create” > “New Kwik Project”
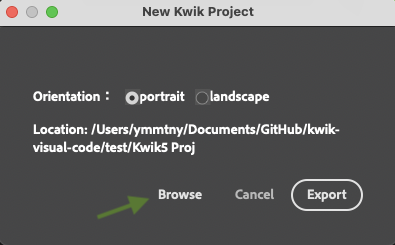
Use the “Browse” button to select your destination folder, then click “Export” to create the new project.
Open your project folder in Finder (Mac) or File Explorer (Windows)
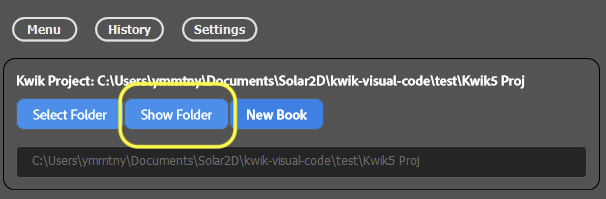
The first time, click “Show Folder” to reveal the folder.
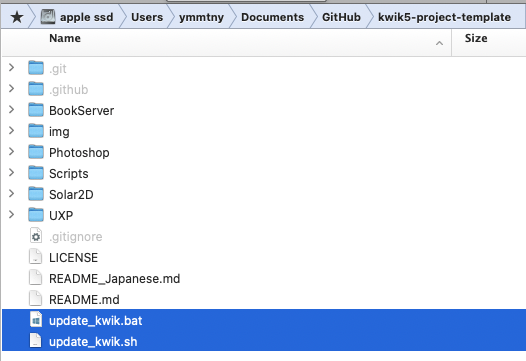
(Optional) update_kwik Script
Your project includes
update_kwik.sh(Mac) andupdate_kwik.bat(Windows). These scripts run automatically iflua_modules/kwiksher/kwikis missing when the simulator starts. You can also run them manually.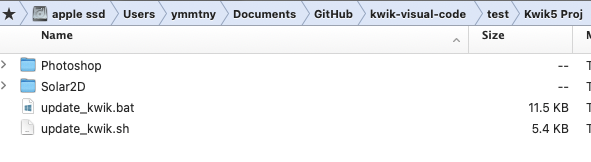
Windows
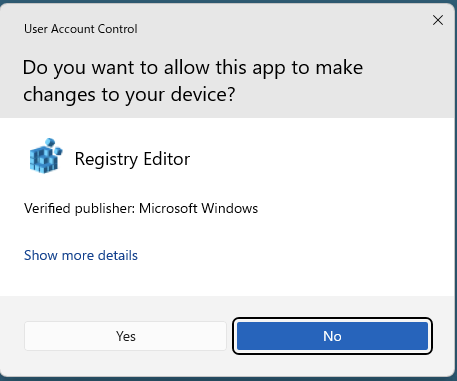
When running
update_kwik.bat, you’ll be asked if you want to install the Solar2D protocol handler. This experimental feature lets you open the Solar2D simulator with asolar2d://URL.Do you want to install the Solar2D protocol handler? (y/n):solar2d.regsets the URL scheme. Choose Yes to enable the protocol.
You can enter a URL like this in your browser on Windows:
solar2d://open?url=file://C:/Users/ymmtny/Documents/Solar2D/kwik-visual-code/develop/Solar2D/kwik5-project-template/Solar2D/main.lua&skin=KwikEditorLandscapeYou can also create a web page that uses the Solar2D URL scheme to launch the simulator directly from your browser.
Menu
Go to the Menu tab – Photoshop Files
Use the “Open” button to select the folder containing your
.psdfiles.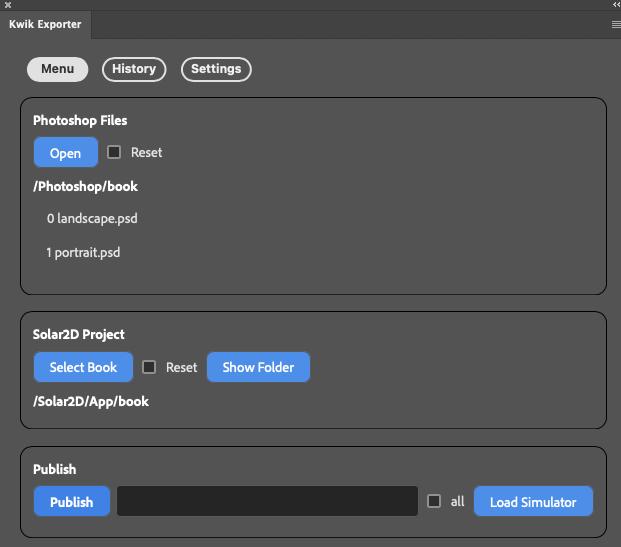
Click a PSD file name to open it.
More details in Kwik Expoter > Menu, you also find Publish Section in Kwik Exporter page
Step 3 – Solar2D Simulator > main.lua
After publishing images and assoicated lua files for a Solar2D project with Kwik Exporter in Photoshop, you can open the solar2d project in Solar2D simulator.
Kwik Exporter has a button to open Solar2D simulator, you can use it or manually open Solar2D simulator app then select the main.lua file
Main.lua
Use vscode to edit the follwoing configuration
For development, set main.lua to development mode and config.lua to adaptive. For production (device build), switch to production mode and set config.lua to letterbox. In production, you don’t need the Kwik editor, so don’t use development mode.
config.lua
For the final device build, change the scale to "letterbox":
scale = “adaptive” to “letterbox”
application = {
  content =
  {
    fps = 60,
    width = 320,
    height = 480,
    -- scale = "adaptive",
    scale = "letterbox",
    xAlign = "center",
    yAlign = "center",
main.lua
Change env.mode = "development" to "production".
Production mode does not load the Kwik editor.
Edit env.props to update the book and page names to match your project.
If the Kwik editor gives an error, try setting
env.restore = trueto recover with .bak files. Set it back to false after recovery.
By default in development, turnOffNativeVideo is set to true (videos won’t play). Set it to false to enable video playback.
local env = require("env")
env.book   = "book"
env.goPage = "landscape"
env.lang   = ""
--
env.restore = false
--
env.mode = "development"
-- env.mode = "production"
-- env.mode = "debug" -- need kwik5-plugin src from kwiksher's repo

--
if env.mode == "development" or env.mode == "debug" then
  env.props = {
    name = env.book,
    editor = true,
    gotoPage = env.goPage,
    language = env.lang, -- empty string "" is for a single language project
    position = {x = 0, y = 0},
    gotoLastBook = false,
    unitTest = false,
    httpServer = false,
    showPageName = true,
    turnOffNativeVideo = true
  }
elseif env.mode == "production" then
  env.props = {
    name = env.book,
    editor = false,
    gotoPage = env.goPage,
    language = env.lang, -- empty string "" is for a single language project
    position = {x = 0, y = 0},
    gotoLastBook = false,
    unitTest = false,
    httpServer = false,
    showPageName = false,
    turnOffNativeVideo = false
  }
end
--
--
system.setTapDelay(0.2)
--
--
if env.setPlugin(env.mode)  then
  local kwik = require("kwiksher.kwik")
  --
  --display.setDefault( "background", 0.2, 0.2, 0.2, 0.1 )
  kwik.useGradientBackground()
  --

  if env.restore and  kwik.restore() then
    native.showAlert("kwik", "restored comment it out kwik.restore()")
    return
  end

  kwik.setCustomModule(
    "custom",
    {
      commands = {"myEvent"},
      components = {
        -- "align",
        "myComponent",
        "thumbnailNavigation",
        "index"
        -- "keyboardNavigation",
      }
    }
  )
  --
  kwik.bootstrap(env.props)
  --
end
Update Kwik modules
update_kwik.sh (Mac) and update_kwik.bat (Windows) fetch the latest release and overwrite the lua_modules folder in Solar2D.
Go to Kwik Editor section for more information what tools are available in Kwik Editor
How to change the default book & page for editing?
for development, gotoLastBook is true. This has one drawback when you change env.book and env.page, it is sticking to the last page previously edited.
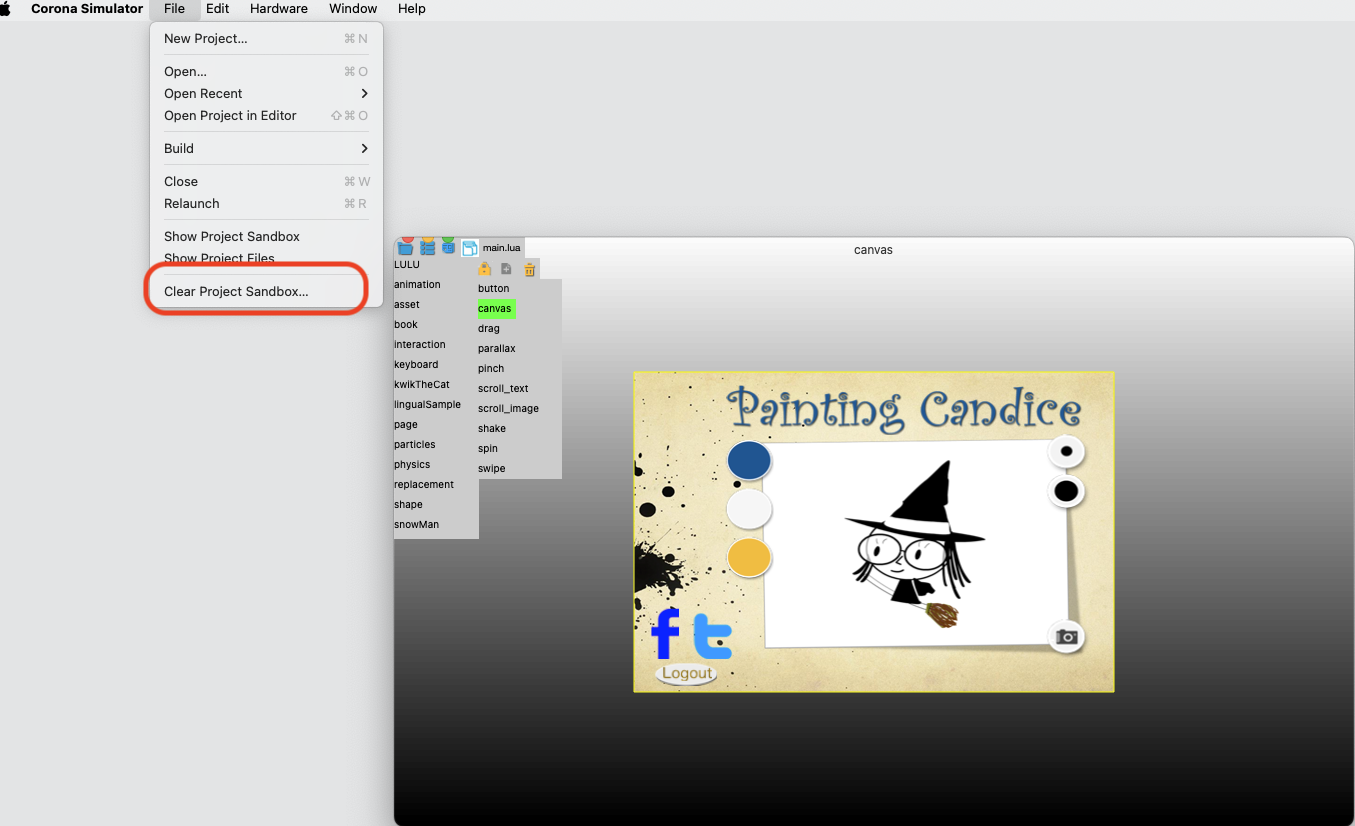
The solution is File > Clear Project Sandbox in Solar2D simulator
local env = require("env")
env.book   = "book"
env.goPage = "landscape"
env.lang   = ""
--
env.restore = false
--
env.mode = "development"
-- env.mode = "production"
-- env.mode = "debug" -- need kwik5-plugin src from kwiksher's repo

if env.mode == "development" or env.mode == "debug" then
  env.props = {
    name = env.book,
    editor = true,
    gotoPage = env.goPage,
    language = "", -- empty string "" is for a single language project
    position = {x = 0, y = 0},
    gotoLastBook = true,
    unitTest = true,
    httpServer = false,
    showPageName = true,
    turnOffNativeVideo = true
  }